
This class focuses on Value and its importance in art. The various aspects of color harmonies, value, color theory, psychology or color, the expressive aspects of color and value in nature and in art/quilts will be discussed and demonstrated. At completion of the class students will see value and color in a new way and will start releasing the artist within.
Students will learn how to use Value to create a focal point, to set the mood in a piece, to create 3-dimensionality or to give the perception of perspective in a landscape.
We will start by creating a perfect 8-value gray scale from fabrics provided by the teacher. Then, we will learn how to look at value using the Periodic Table of Value in Color and Grace’s Value Matching Tool.
Supplies
This class will require a kit provided by the teacher containing:
- Fabric Gray Scale
- Value Matching Tool
- Value in Color Chart
Kit price: $25
Please bring
- Color wheel (small is OK);

This an in-person 3 hour class but also is an ideal Class for a 3 hour Virtual ZOOM session. In this class the student will learn a “collage with templates” technique totally new and amazing. It is easy, foolproof, and the results are always amazing and it produces a no-fray raw edge applique. You will create an amazing quilt top.
I will include a lesson on Value and how it helps in making amazing quilts by helping in the fabric choosing.
Students will work on a BIRD pattern but will be able to choose any color they prefer the bird to be. Many options will be shown in class. At the completion of this 3 hour class they will go through the steps for creating a textile focal point with the “Heat-Set” technique, they will understand the process and will have material to refresh and follow up beyond the ZOOM session.
This class required a kit described in the Supplies page.
Please contact Grace to arrange time, date, price, and to ensure that there is adequate time for the Kit Supplies provided by Grace can be shipped in time. We can do this class for large groups and/or for single individuals that are interested in learning this technique.
Classes at the October 28-November 3, 2019 International Quilt Festival – Houston
Monday, October 28: #137 –Birds of Many Colors—With the Amazing “Heat-Set” Appliqué Technique, 9 AM-Noon, $30 materials fee
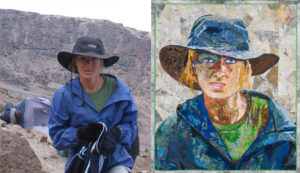
Monday, October 28: #159 –Create a Pattern from a Photo, 2-5 PM, $35 materials fee
Monday, October 28: #173 –Coneflower Power—With the Amazing “Heat-Set” Appliqué Technique, 6-9 PM, $30 materials fee
Tuesday, October 29: #217 –Irises—With the Amazing “Heat-Set” Technique, 9 AM-5 PM, $30 materials fee
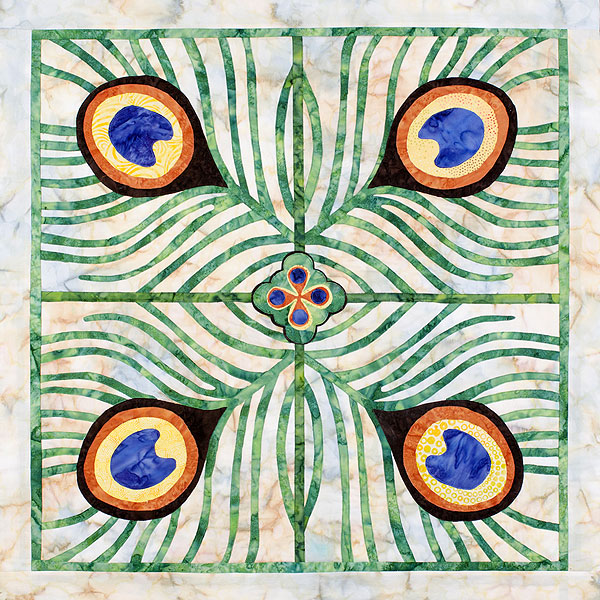
Wednesday, October 30: #323 -Flying Feathers—With the Amazing “Heat-Set” Appliqué Technique, 9 AM-5 PM, $30 materials fee
Thursday, October 31: #441 –Create a Pattern from a Photo, 9 AM-Noon, $35 materials fee
Thursday, October 31: #479 –Birds of Many Colors—With the Amazing “Heat-Set” Appliqué Technique, 2-5 PM, $30 materials fee
Friday, November 1: Lecture—#563 –The Value of “VALUE”, 8-9 AM LECTURE
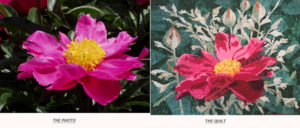
Friday, November 1: #513 –Make a Favorite Photo Become an Amazing Quilt Top, 9 AM-5 PM, $35 materials fee
Friday, November 1: #607 –Dynamic Random Backgrounds Created Using Appliqué, 6-9 PM, $40 materials fee (BERNINA)
Saturday, November 2: #738 –Creative Thread Drawing to Enhance Your Quilt, 9 AM-Noon, $40 materials fee (BERNINA)
Sunday, November 3: #802 –Quilt Finish—”Bordings”—Border and Binding in One Step, 9 AM-Noon, $40 materials fee (Baby Lock
Link to general enrollment/wait list/refund/information (and much more!):
http://www.quilts.com/quilt-festival-houston-class-information.html
Link to classes/events by day:
http://www.quilts.com/quilt-festival-houston-classes-and-events-monday.html
Below is a description of some of these classes:
1)Birds or all Colors – 2) Coneflower Power – 3) Irises – 4) Flying Feathers with the Amazing “Heat-Set” Technique
1) BIRDS OF ALL COLORS with the Amazing “Heat-Set” Collage with Templates– 3 HOURS
October 28 – 9am-noon; October 31 – 2-5pm;
In this class you will learn an “collage with templates” technique totally new. You will use nothing else once you try it. It is easy, foolproof, and the results are always amazing and it produces a no-fray raw edge applique. Grace will demonstrate and you will create an amazing flower quilt top. You will be able to choose a favorite bird of yours and we will adapt it to Grace’s Generic Bird Pattern. See some of Grace’s examples in the picture for this class.
So come, learn, and practice this technique with the inventor, developer, and teacher of this most amazing new revolutionary applique technique.

KIT PROVIDED:
Pattern of the Bird Quilt Top you will make – approx. 16”w x 22” high; Product used in the technique; dispensing bottle, pins, vinyl and freezer paper
Kit fee: $30
For the BIRD:
Take a look at the pictures and collect fat eights (16” x 22”), fat quarters, or palm size scraps of various colors including greens. Ensure you have lights and darks in your mix. Pay attention to the picture you chose and match the fabrics as close as possible.
You will not need a background in this class. You can choose one later
Board – 20″x24″ Insulation Board (usually 1- 1/4″ thick). You can get it at Home Depot, Lowe’s or any building supply store. Optionally, cover this board with “Insul-Brite” but this is NOT required. Optionally, you can use the Cushioned Quilters’ Square n’ Blocker by J. Taylor;
Brush – soft, ¼” wide;
Pencils and Pens: Black and Red colored pencils, Paper, pen, & pencil, Fine-tip black Sharpie pen
Teflon Pressing Cloth for appliqué, any size but the larger the better. Grace will provide an alternate for sale;
2) and 3) CONEFLOWER POWER (3 HOURS) and IRISES (6 HOURS) with the Amazing “Heat-Set” Collage with Templates
October 28 – 2-5pm; October 29- 9am – 5pm;
In this class you will learn an applique technique totally new. You will use nothing else once you try it. It is easy, foolproof, and the results are always amazing and it produces a no-fray raw edge applique. Grace will demonstrate and you will create an amazing flower quilt top.
The CONEFLOWER POWER class is a 3 hours class and we will be making a beautiful coneflower from a simple pattern provided by Grace. The IRISES class is a 6 hours class. We will focus on learning the technique on an Iris pattern and in this 6 hour class we will be able to do a more complex pattern and get further into its completion.
So come, learn, and practice this technique with the inventor, developer, and teacher of this most amazing new revolutionary applique technique.

KIT PROVIDED:
Pattern of the flower you want to make – approx. 16”w x 22” high; Product used in the technique; dispensing bottle, pins, vinyl, and freezer paper.
Kit fee: $30
For the Flower:
Take a look at the pictures and collect fat eights (16” x 22”), fat quarters, or palm size scraps of various colors including greens. Ensure you have lights and darks in your mix. Pay attention to the picture you chose and match the fabrics as close as possible.
You will not need a background in either one of these classes. You can choose one later.
Board – 20″x24″ Insulation Board (usually 1- 1/4″ thick). You can get it at Home Depot, Lowe’s or any building supply store. Optionally, cover this board with “Insul-Brite” but this is NOT required. Optionally, you can use the Cushioned Quilters’ Square n’ Blocker by J. Taylor;
Brush – soft, ¼” wide;
Pencils and Pens: Black and Red colored pencils, Paper, pen, & pencil, Fine-tip black Sharpie pen
Teflon Pressing Cloth for appliqué, any size but the larger the better. Grace will provide an alternate for sale;
4) FLYING FEATHERS with the Amazing “Heat-Set” Collage with Templates – 6 hours
October 30 – 9am-5pm;
Description:
In this class you will learn both “free edge” and the “heat-set” applique and be introduced to tools to enable you to create amazing textile work.
We will focus on creating a bird as shown, and giving her a 3-dimensional, realistic feel and look with fluffy feathers. You will be amazed and pleased on how realistic this bird will look. The techniques used and learned will be:
- a) “Free edge” is the technique used to create the feathers, where all the exposed feather shapes edges are left unattached, or “free”, giving them the appearance of real, fluttering 3-dimensional feathers.
- b) “Heat-Set” is used for the head and other parts of the bird. This new and amazing technique allows you to do raw edge without fraying edges. This is an amazingly easy technique that you will use for any raw edge applique from this class forward.
So learn it from the developer, inventor, and the only teacher of this new technique.


KIT PROVIDED:
Pattern of the Bird Quilt Top you will make – approx. 29”w x 22” high; Product used in the technique; dispensing bottle, pins, vinyl and freezer paper
Kit fee: $30
Supply List:
Pencils and Pens: Black and Red colored pencils, Paper, pen, & pencil, Fine-tip black Sharpie pen
Board – 20″x20″ Insulation Board (usually 1- 1/4″ thick). You can get it at Home Depot, Lowe’s or any building supply store. Optionally, cover this board with “Insul- Brite” but this is NOT required.
Optionally, you can use the Cushioned Quilters’ Square n’ Blocker by J. Taylor
Teflon Pressing Cloth for appliqué, any size but the larger the better. Grace will provide an alternate for sale
Brush – soft, ¼” wide
Fabric Supplies: Choose either the Blue Jay or the Hummingbird and bring fat eights (9” x 22), fat quarters (14” x 17”), or palm size scraps. Ensure you have lights and darks in your mix. Pay attention to the picture and match the fabrics as close as possible.
You will need a background in this class. Bring about 1 yard of a contrasting background fabric. Take a look at the pictures for inspiration.
If you have any questions, please send an email to gracerrea@gmail.com
Class Description
This class is for beginners as well as advanced quilters. Here you will learn a number of techniques and will be introduced to tools that will enable you to create amazing textile work.
We will focus on creating bird images and giving them a 3-dimentional, realistic feel and look. Grace will provide a generic bird pattern. You will be able to choose your colors, change the head-crest, tail, or beak and create your favorite bird. The techniques will be:
- “Free-Edge” Machine Applique is the technique used in creating the feathers of the bird, where all the exposed feather shape edges are left unattached, or “free”, giving them the appearance of real, fluttering 3-dimensional feathers. This technique is useful in creating very realistic tree bark, fish scales, etc. as well.
- “Heat-Set” Machine Applique technique is used for the head of the bird and all other components of the quilt. This enables you in this piece and any other you do thereafter, to create raw-edge applique without any fraying from the raw edges of the fabric. This is an amazingly easy and foolproof technique you really want to learn.
Grace will discuss and demonstrate the quilting process so that you can walk out with a quilt top that can be easily and quickly completed. You will have bragging rights to it and you will have learned two amazing techniques.
There will NOT be sewing in this workshop.
The teacher will provide you pattern, the “Heat-Set” product, a dispenser, and the needed pins in the required class kit.
See Supplies here: Bird View Supplies
3-Dimensional Flanges and perfect bindings add spark and a professional finish to your quilts.
In this class details of how to do perfect bindings and 3-dimensional flanges will be covered with step-by-step demos. Working on practice pieces will allow you to achieve perfection and stunning results with this edge-ing. You will learn how to:
1) prepare the quilt for the edge finish
2) prepare and apply the 3-d flange and a double 3-d flange
3) prepare and apply the binding
4) join the tails correctly to finish the binding
5) finishing binding techniques for a show quality quilts
6) create a “bording” – border and binding in one
7) prepare and apply a hanging sleeve and hanging corners to the back
Supply List

 .
. 


